[ad_1]
Construct customized internet apps simply and shortly

Meet NiceGUI, a easy Python-based UI framework that works easily together with your internet browser or as a desktop app. Whether or not you’re making small internet apps, dashboards, or taking part in with robotics tasks, NiceGUI makes it straightforward with its straightforward interface and plenty of options.
The purpose of this submit is to persuade you to attempt it out by itemizing the professionals and cons of this library by displaying you how one can construct and deploy a NiceGUI app. (This isn’t a sponsored submit, I identical to the library 🙃)
Streamlit vs. NiceGUI: Why Swap?
Whereas Streamlit is nice for making interactive apps, it may be tough to deal with occasions and states, particularly for larger tasks. NiceGUI is completely different. It permits you to management states and interactions immediately, without having further steps or hacky workarounds.
Easy State Administration
NiceGUI makes managing states straightforward. In contrast to Streamlit, which might reset states unexpectedly, NiceGUI retains issues regular, whether or not it’s the beginning state or adjustments made by customers. You should use callbacks to deal with person interactions in event-based method with out getting irritated by a full web page refresh and dropping state knowledge.
Numerous Options
NiceGUI has many cool options:
- Buttons, switches, sliders, inputs, and extra for interplay.
- Simple methods to rearrange issues on the display.
- Charts, tables, and even 3D scenes for visuals.
- Integration with knowledge visualization libraries like Matplotlib or Plotly.
- Customise colours and types simply.
- Instruments to assist with coding and testing.
- Principal devs are all the time accessible to reply questions and are very receptive to suggestions on their GitHub house.
- Construct on high of standard frameworks: FastAPI, Vue3, Tailwind, Quasar.
- Their complete website is made with the NiceGUI library: https://nicegui.io/documentation
Limitations
Whereas NiceGUI is nice, it’s value noting that its smaller group dimension is likely to be slightly limiting. It additionally has a barely longer studying curve in comparison with extra standard frameworks like Streamlit. It’s preferable to get aware of CSS and Tailwind CSS to profit from the library’s options. Additionally, data of FastAPI, Vue and Quasar can offer you higher flexibility and lengthen what you’ll be able to implement.
Palms-On
Now, lets discover some options of NiceGUI after which construct and deploy a demo app.
Primary app
First set up NiceGUI:
pip set up nicegui[highcharts]
Lets begin from an instance from the primary documentation:
# https://nicegui.io/documentation/section_data_elements
from nicegui import ui
from random import random

chart = ui.highchart({
    'title': False,
    'chart': {'kind': 'bar'},
    'xAxis': {'classes': ['A', 'B']},
    'collection': [
        {'name': 'Alpha', 'data': [0.1, 0.2]},
        {'identify': 'Beta', 'knowledge': [0.3, 0.4]},
    ],
}).lessons('w-full h-64')

def replace():
    chart.choices['series'][0]['data'][0] = random()
    chart.replace()

ui.button('Replace', on_click=replace)

ui.run()
Right here, the UI module is what is going to permit you to create a UI ingredient.
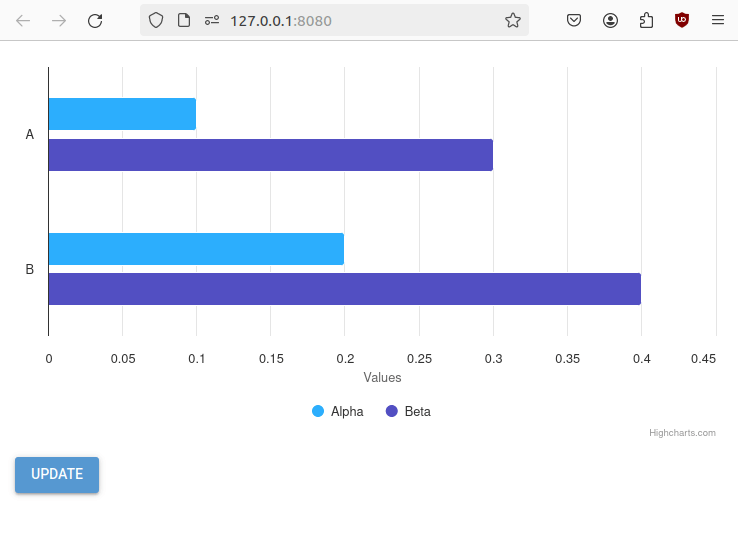
On this instance, first we create a highchart ingredient, we assign to it the tailwind lessons w-full and h-64. w-full will make it use the entire display horizontally in a response method and h-64 specifies the top.
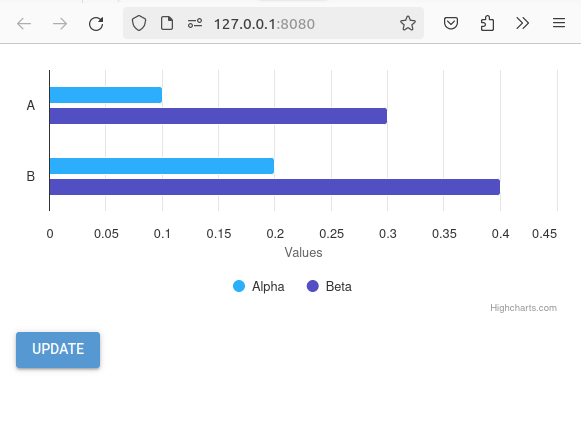
Once we click on on the button, a callback perform is triggered. This callback will replace the information used for the chart after which re-renders it in a fluid method.
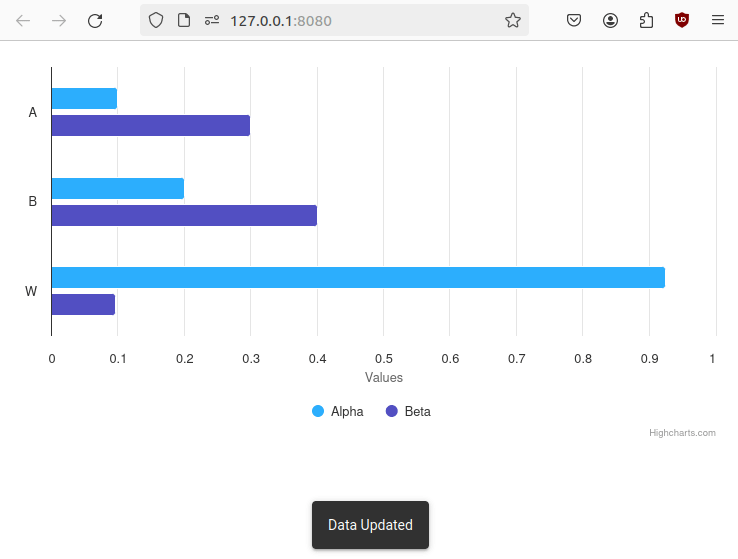
It’s also possible to change the callback so as to add new bars:
def replace():
    chart.choices["xAxis"]["categories"].append(random.alternative(string.ascii_uppercase))
    for collection in chart.choices['series']:
        collection["data"].append(random.random())
    chart.replace()
Additionally, discover that refreshing the web page doesn’t make you lose your knowledge! You possibly can’t try this with another Python UI libraries. The explanation why it really works that method right here is that knowledge is shared amongst all customers, however there are many methods to maintain knowledge user-specific just like the app.storage.person object or app.storage.browser (when wrapped round a @ui.web page decorator).
However, what if you wish to replace the UI on a recurrent timer? straightforward ! Simply change the button ingredient to ui.timer
ui.timer(5, callback=lambda: (replace(), ui.notify("Information Up to date")))
Now, allow us to construct a demo app that lets customers decide a class then permits them to generate a random Chuck Norris Reality.
First, right here is the primary code:
import requests  # Importing the requests library to make HTTP requests
from nicegui import ui  # Importing UI elements from the NiceGUI library
from nicegui_app.header import add_head_html  # Importing a perform so as to add HTML head content material

# Record of classes for Chuck Norris information
CATEGORIES = [
    "animal",
    "career",
    "celebrity",
    "dev",
    "fashion",
    "food",
    "money",
    "movie",
    "music",
    "science",
    "sport",
    "travel",
]

# Class to deal with Chuck Norris information
class Reality:
    def __init__(self):
        self.reality = None  # Initialize the very fact attribute to None

    # Technique to replace the very fact primarily based on a given class
    def update_fact(self, class):
        url = f"https://api.chucknorris.io/jokes/random?class={class}"  # URL to Chuck Norris API

        for i in vary(10):  # Attempt as much as 10 instances to fetch a sound reality
            outcome = requests.get(url)  # Make a GET request to the Chuck Norris API

            if outcome.status_code == 200:  # If the request is profitable
                result_json = outcome.json()  # Parse the JSON response
                if self.reality != result_json["value"]:  # If the fetched reality is completely different from the present one
                    self.reality = result_json["value"]  # Replace the very fact attribute
                    break  # Exit the loop

# Perform to generate the Chuck Norris reality UI
def chuck():
    add_head_html()  # Add HTML head content material for the NiceGUI app

    default_value = CATEGORIES[0]  # Default class for Chuck Norris information

    reality = Reality()  # Create an occasion of the Reality class
    reality.update_fact(default_value)  # Replace the very fact utilizing the default class

    # Create a grid format with 12 columns
    with ui.grid(columns=12).lessons("w-full"):
        # Column for class choice
        with ui.column().lessons("col-span-4 sm:col-span-2 space-x-0"):
            ui.label("Choose a reality class:")  # Show a label for class choice
            # Radio button group for choosing classes
            class = ui.radio(
                CATEGORIES,
                worth=default_value,
                on_change=lambda _: reality.update_fact(class.worth),  # Replace the very fact when the class adjustments
            ).lessons("w-full")
            # Button to regenerate the very fact for the chosen class
            ui.button(
                "⟳ Re-Generate", on_click=lambda _: reality.update_fact(class.worth)
            )

        # Column for displaying the Chuck Norris reality
        with ui.column().lessons(
            "flex col-span-8 sm:col-span-10 w-full justify-center mx-auto max-w-screen-md"
        ):
            # Label to show the Chuck Norris reality, certain to the very fact attribute of the Reality occasion
            ui.label().bind_text_from(reality, "reality").lessons(
                "text-lg sm:text-3xl text-gray-800 bg-gray-100 rounded-lg shadow-lg p-6"
            )
Now allow us to undergo it step by step:
First, we make the required imports and outline the potential classes.
Then, we outline the category that may retailer and replace our random reality:
class Reality:
    def __init__(self):
        self.reality = None  # Initialize the very fact attribute to None

    # Technique to replace the very fact primarily based on a given class
    def update_fact(self, class):
        url = f"https://api.chucknorris.io/jokes/random?class={class}"  # URL to Chuck Norris API

        for i in vary(10):  # Attempt as much as 10 instances to fetch a sound reality
            outcome = requests.get(url)  # Make a GET request to the Chuck Norris API

            if outcome.status_code == 200:  # If the request is profitable
                result_json = outcome.json()  # Parse the JSON response
                if self.reality != result_json["value"]:  # If the fetched reality is completely different from the present one
                    self.reality = result_json["value"]  # Replace the very fact attribute
                    break  # Exit the loop
This class shops the very fact within the attribute “reality” and has a technique update_fact that calls the Chuck Norris information api. https://api.chucknorris.io
Subsequent, we outline our web page within the “chuck” perform. NiceGUI adopts a modular strategy that allows you to outline your app over a number of modules and python recordsdata.
We outline an occasion of our knowledge class reality = Reality() This can be a particular occasion to every person. Subsequent, we init the very fact utilizing the update_fact methodology.
Now, we begin defining our UI parts.
We outline a grid with two columns:
- A primary column that has our class choices and generate button. This one has the next tailwind lessons: col-span-4 sm:col-span-2. It implies that for very small screens it’s going to deplete 4/12 of the display, in any other case it’s going to deplete 2/12. This makes the design work in cell phones too.
- A second column the place we are going to show the reality.
For the primary column:
- A radio menu ui.radio.
- A button to generate a random reality.
Each parts, when clicked or modified will use a callback that calls reality.update_fact
For the second column:
- Now we have a ui.label that binds its worth to reality.reality so every time this variable adjustments, it’s going to replace the show routinely.
The label has the next tailwind lessons: text-lg sm:text-3xl This makes it so the textual content is smaller on small screens.
This offers you the next app:
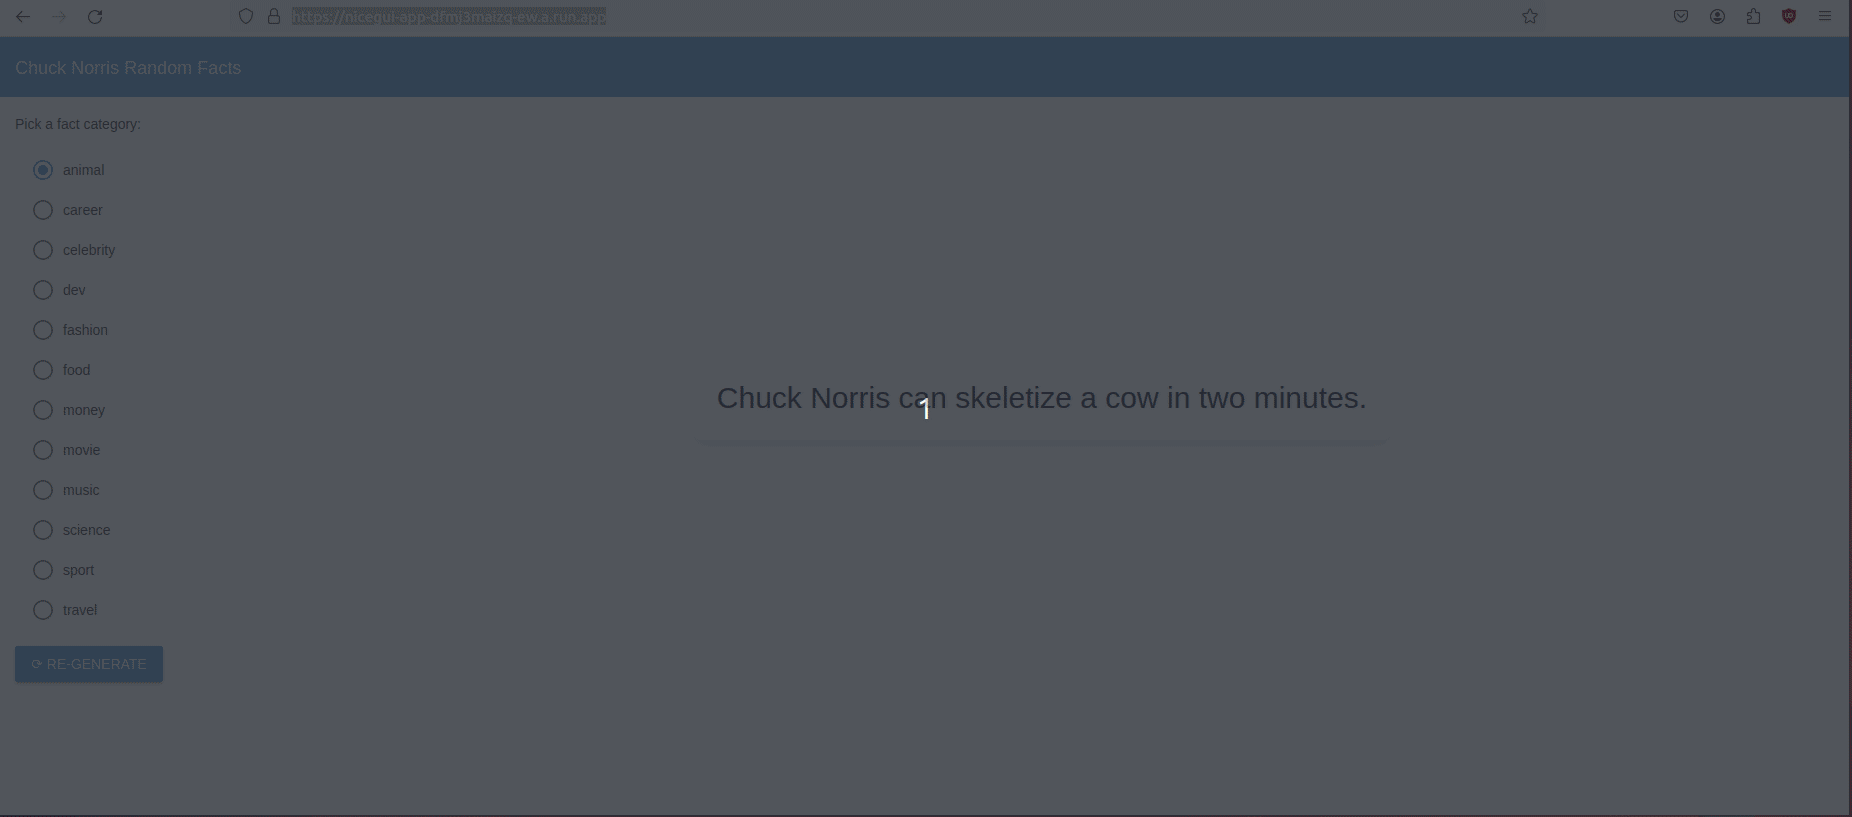
Neat! proper?
Deployment
Deploying such app is simple! Utilizing CloudRun for instance. You simply need to create a Dockerfile after which run the next gcloud directions:
PROJECT_ID=$(gcloud config get-value mission)
REPO="demo"
LOCATION="europe-west1"
IMAGE="nicegui_app"
SERVICE_NAME="nicegui-app"
VERSION="0.0.1"
GAR_TAG=$LOCATION-docker.pkg.dev/$PROJECT_ID/$REPO/$IMAGE:$VERSION

# Create repository
gcloud artifacts repositories create $REPO --repository-format=docker
    --location=$LOCATION --description="Docker repository"
    --project=$PROJECT_ID  || true # If fails as a result of exist already then its nice

# Construct picture
gcloud builds submit --tag $GAR_TAG

# Deploy Cloud run
gcloud run deploy $SERVICE_NAME --image=$GAR_TAG --max-instances=1 --min-instances=0 --port=8080
 --allow-unauthenticated --region=europe-west1 --memory=0.5Gi --cpu=1 -q --no-cpu-throttling --session-affinity
This builds the docker picture utilizing cloud construct after which deploys it to CloudRun.
The one key choices listed here are: “ — no-cpu-throttling — session-affinity” This permits the identical person to be routed the identical container when potential and retains the CPU alive between requests. You possibly can attempt it out right here: https://nicegui-app-dfmj3maizq-ew.a.run.app/
In Conclusion
NiceGUI is a superb alternative if you wish to make person interfaces shortly and simply with Python. It is going to aid you construct highly effective python apps the place you keep full management of the interior state and you can check and deploy simply. Hopefully, it could possibly permit you to categorical your creativity in your knowledge science tasks with out being restricted by instruments.
What was proven right here is only a small fraction of what you are able to do with NiceGUI. You possibly can study extra by following the hyperlinks beneath.
Assets:
- Chuck Norris (very exaggerated) Info API: https://api.chucknorris.io/
- NiceGUI documentation: https://nicegui.io/documentation
- NiceGUI examples: https://github.com/zauberzeug/nicegui/tree/major/examples
- Code for this submit: https://github.com/CVxTz/nicegui_tutorial
- Demo app: https://nicegui-app-dfmj3maizq-ew.a.run.app/
Meet the NiceGUI: Your Quickly-to-be Favourite Python UI Library was initially printed in In the direction of Information Science on Medium, the place individuals are persevering with the dialog by highlighting and responding to this story.
[ad_2]
Supply hyperlink